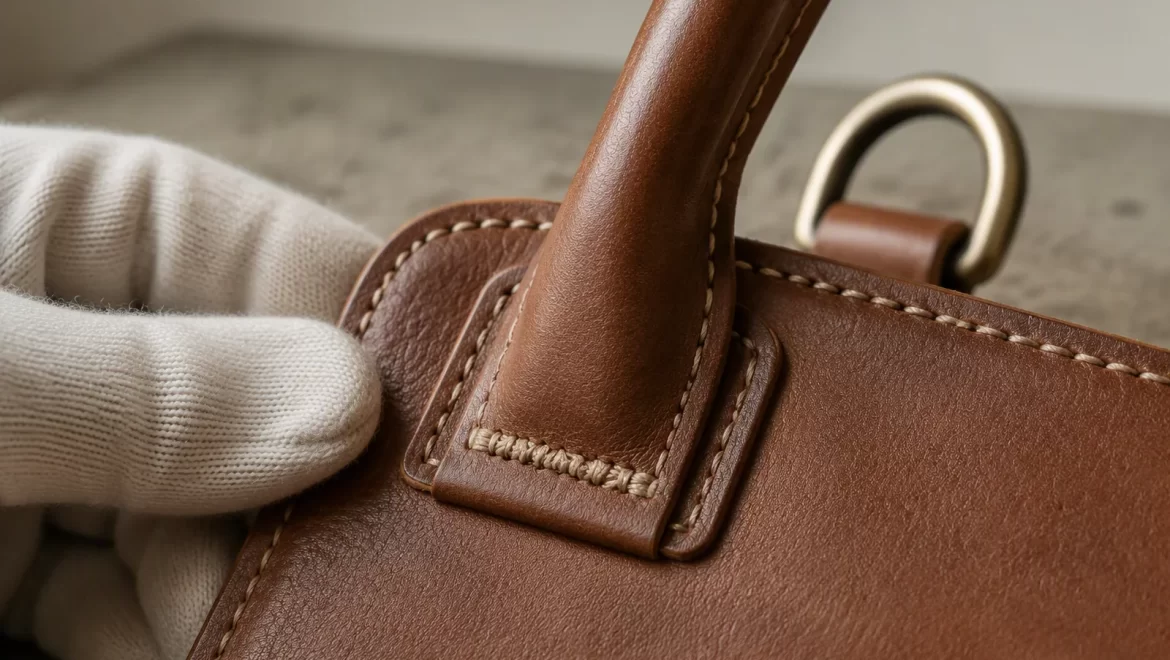
How Should Bar Tacks and Box-X Stitching Reinforce Stress Points?
- Why Stress Points Fail First
- A Working Map of Stress Points
- What a Bar Tack Actually Does
- Box-X Stitching and Its Proper Use
- Reinforcing With Patches and Interfacing
- Rivets, Screws and Hardware Attachment
- Following the Load Path
- Material Differences That Change the Rule
- How Poor Reinforcement Fails
- Testing That Reproduces Real Load
- Writing the Specification
- Inspection at the Line
- Common Reinforcement Errors
- Verifying Reinforcement at Sampling
- Cost and Workstation Time
- Reinforcement Across Bag Types
- Serviceability and Replacement
- Machine Set-Up for Bar Tacks
- Fixtures and Templates
- Using Warranty Data as an Input
- A Reinforcement Schedule in One Table
- Training Operators on Reinforcement
- Briefing a Supplier on Reinforcement
- FAQ
A pet bag fails at a handful of places, and almost all of them are where a handle, a strap, a ring or a zip end pulls against a panel. Reinforcement is the discipline of deciding in advance which of those places will carry load and how.
Bar tacks, box-X stitching, rivets, patches and interfacing are not interchangeable decorations. Each one distributes force differently, and a bag reinforced with the wrong one will fail in a way that looks like a material fault rather than a construction decision.
Why Stress Points Fail First
Load in a bag is never spread evenly. It concentrates at the small number of places where a flexible panel meets a rigid component.
The Concentration Effect
A handle transfers the whole weight of the contents into four small stitch areas. Those areas see many times the average stress of the panel, which is why they fail long before the leather wears through.
Fatigue Rather Than Overload
Most failures are not caused by one heavy load. They come from thousands of small movements that enlarge needle holes and abrade thread until the seam gives way at normal weight.
The Hidden Start
A stress failure begins inside the seam where nobody inspects. By the time it is visible on the surface, the reinforcement has already stopped working.
| Failure driver | Effect on the seam |
|---|---|
| Static load | Gradual hole enlargement |
| Repeated swing | Thread abrasion |
| Point loading | Local tearing |
| Moisture and grit | Fibre weakening |
A Working Map of Stress Points
Every pet bag has the same short list of critical points, and naming them makes the specification possible.
Handle and Strap Roots
The four points where a handle meets the body carry the greatest load in any carrier. They need the heaviest reinforcement on the bag and the most generous patch.
Ring and D-Ring Attachments
A ring attachment is a pivot, so it moves constantly and abrades the loop around it. These points fail by wear rather than by tearing.
Zip Ends and Gusset Corners
The end of a zip takes a point load every time the bag is opened fully. A gusset corner takes a folding load on every fold and unfold.
Base Corners and Feet
Base corners meet floors, kerbs and car boots. They combine abrasion with compression, and reinforcement there is as much about wear as about strength.
| Stress point | Dominant load | Priority |
|---|---|---|
| Handle roots | Tension | Highest |
| Strap roots | Tension and shear | Highest |
| Ring loops | Abrasion | High |
| Zip ends | Point load | High |
| Gusset corners | Folding | Medium |
| Base corners | Abrasion | Medium |

What a Bar Tack Actually Does
A bar tack is a short run of dense zigzag stitching that locks a seam end and spreads load across a small area instead of a single point.
Density and Length
Density is usually stated as stitches per centimetre, and length as millimetres. A tack that is dense but too short creates a hard point; a tack that is long but sparse does not lock the seam.
Position Relative to the Seam
A tack should sit across the seam end, centred on the line of force, not offset to one side. Offset tacks pull the seam sideways under load and produce a curve in the handle.
Number and Spacing
Two tacks per handle root, one at each seam end, is the common minimum. Where the panel is thin, three shorter tacks distribute better than two long ones.
| Parameter | Typical range |
|---|---|
| Stitch density | 8 to 12 per cm |
| Tack length | 8 to 15 mm |
| Tacks per root | 2 to 3 |
| Thread | Same as seam or heavier |
Box-X Stitching and Its Proper Use
The box-X is the classic reinforcement for a strap end, and it is frequently applied where a bar tack would be better.
What the Box Does
The box follows the outline of the strap end and the X crosses the interior, so load is shared between the perimeter and the diagonal. It suits wide straps that would otherwise curl at the end.
Where It Underperforms
On a narrow handle root, the box occupies more panel than the load requires and perforates the leather with long stitch lines. A tack concentrates the same strength in a smaller area.
Spacing the X
The diagonal should run corner to corner without crossing the perimeter stitch. A diagonal that touches the box line creates a cluster of penetrations where tearing begins.
| Strap width | Recommended |
|---|---|
| Under 20 mm | Bar tack |
| 20 to 30 mm | Box-X or tack |
| Over 30 mm | Box-X with backing |
| Webbing loop | Box-X |
Reinforcing With Patches and Interfacing
Stitching can only hold what the panel can carry, so the layer beneath the stitch matters as much as the stitch itself.
Reinforcement Patches
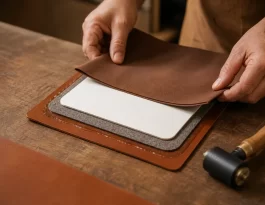
A patch of the same leather, or of a heavier hide, is bonded or stitched behind the handle root. It doubles the material that resists tearing without changing the outside appearance.
Interfacing and Backing
A woven or non-woven interfacing stiffens the area and spreads load across a wider field. It is thinner than a patch and better where the bag must stay soft.
Bonding Versus Stitching
A bonded patch distributes load continuously, but only if the adhesive suits the finish. A stitched patch is more reliable on oily or coated leather, at the cost of more perforations.
| Method | Strength gain | Softness cost |
|---|---|---|
| Leather patch | High | Moderate |
| Interfacing | Moderate | Low |
| Bonded patch | High | Low |
| Stitched patch | High | Moderate |
Rivets, Screws and Hardware Attachment
Metal fastenings change the mechanics of a stress point, and they introduce a failure mode that stitching does not have.
Rivets
A rivet compresses the layers and holds them mechanically, which is strong on thick leather and poor on thin or coated material where the rivet can pull through. The head must sit on a reinforcement patch, not on the panel alone.
Screws and Posts
A screw post allows a ring to be replaced, which is useful in aftercare. It also works loose under vibration unless it is set with a thread lock and checked at final inspection.
Combining Metal and Stitch
The strongest attachment usually combines both: a stitched loop carrying the load and a rivet preventing the loop from spreading. Using one without the other leaves a known weakness.
| Fastening | Best material | Weakness |
|---|---|---|
| Rivet | Thick leather | Pulls through thin panels |
| Screw post | Any, serviceable | Loosens |
| Stitched loop | All | Abrades at ring |
| Stitch plus rivet | All | Cost and time |
Following the Load Path
Reinforcement works when it forms a continuous path from the load to the structure, and fails when the path is interrupted.
Continuity From Handle to Base
A handle that is stitched only to the top panel transfers load into a seam that is not designed for it. The path should continue into a side panel or a base reinforcement.
Interrupted Paths
Where a decorative band, a zip or a pocket interrupts the path, the load concentrates at the interruption. Adding a tack at each side of the interruption restores continuity cheaply.
Load Sharing Between Points
Four handle roots share load only if the panel between them can distribute it. On a soft bag, a stiffened top edge does more for load sharing than heavier stitching at each root.
| Path element | Function |
|---|---|
| Handle | Collects load |
| Root tack | Transfers to panel |
| Patch | Spreads across panel |
| Side seam | Carries to base |
| Base panel | Distributes to floor |

Material Differences That Change the Rule
The same reinforcement that saves a full-grain panel can destroy a coated one, because the materials fail in different ways.
Full Grain and Top Grain
Leather tears along a line of closely spaced holes, so reinforcement must reduce perforation density rather than add stitches. A patch and two tacks outperform a long box on these panels.
Coated Textiles
A coating delaminates before the weave tears, so load has to be spread across area rather than depth. Bonded patches and wider stitch spacing suit these materials.
Bonded and Split Leather
The fibrous structure of bonded leather creeps under sustained load, so a stress point that holds in testing may still stretch over a season. Reinforcement should extend further from the point than on a hide.
| Material | Failure mode | Response |
|---|---|---|
| Full grain | Tear along holes | Fewer, denser tacks |
| Coated textile | Delamination | Bonded patch |
| Bonded leather | Creep | Wider patch |
| Woven webbing | Abrasion | Box-X |
How Poor Reinforcement Fails
Failure patterns are diagnostic, and each one points back to a specific decision made at sampling.
Tear Along the Tack
A panel that tears along the tack line had too many penetrations in too little material. The fix is a patch or fewer tacks, not a heavier thread.
Thread Break at the Tack
Thread that breaks inside a tack was either too fine for the load or abraded by a rough eye or a worn needle. It is the cheapest failure to prevent and the most common.
Pull-Through at the Rivet
A rivet that pulls through was set on a panel without a backing layer. The hole enlarges until the head passes through, usually within a season of use.
Hardware Deformation
A ring that opens under load was undersized for the application rather than badly attached. Reinforcement cannot correct a component chosen for appearance rather than strength.
| Pattern | Root cause |
|---|---|
| Tear along tack | Excess perforation |
| Thread break | Size or abrasion |
| Pull-through | No backing layer |
| Ring opens | Component undersized |
Testing That Reproduces Real Load
A bag that survives a static pull in the sample room may still fail in a car boot, so the test has to imitate use rather than strength.
Static Load
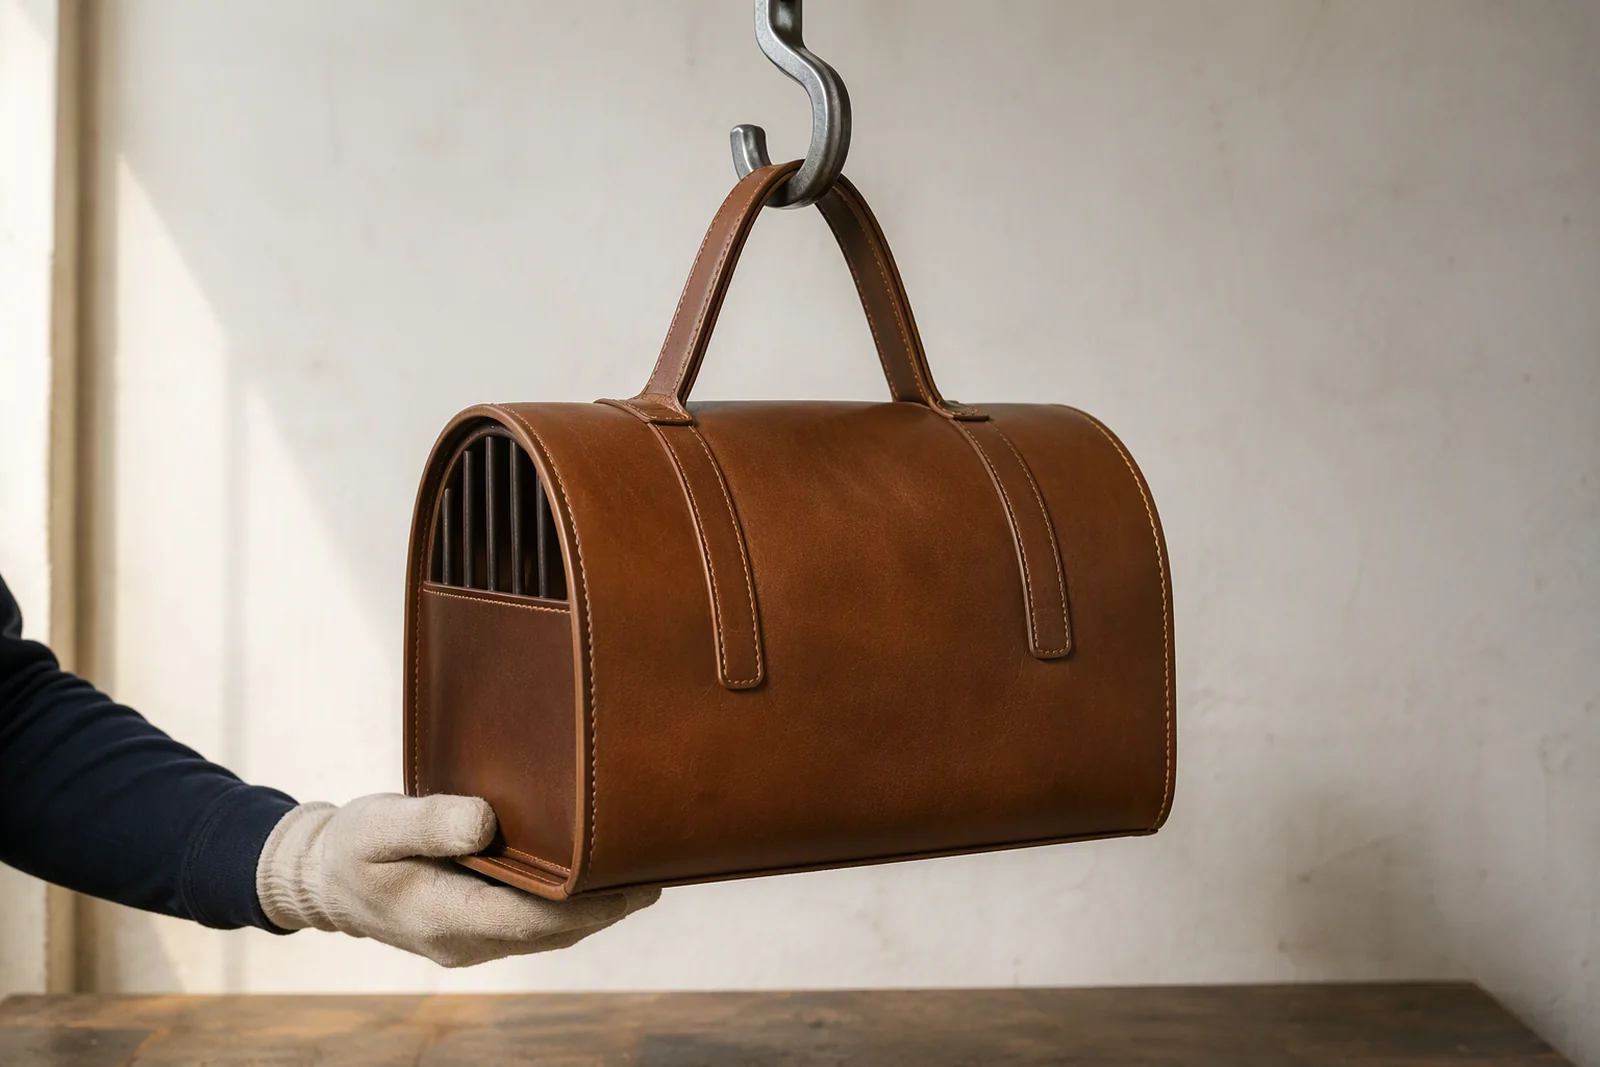
Hanging a filled bag for a stated period shows whether a tack holds under sustained tension. It does not show abrasion, which is the more common failure.
Dynamic Swing and Drop
Repeating a lift and swing cycle reproduces the fatigue that opens needle holes. A short cycle count on one handle root is often enough to expose a weak decision.
Abrasion Cycles
Rubbing a strap against a hard edge, with grit present, tests the ring loop and the base corners. This is the test most often omitted and most often relevant.
| Test | Reveals |
|---|---|
| Static hang | Tack strength |
| Swing cycle | Hole fatigue |
| Drop | Joint integrity |
| Abrasion | Loop wear |
Writing the Specification
A stress point is only controlled when the specification states placement, size, density and backing in a form an operator can check.
Placement on the Drawing
Mark each stress point on the technical drawing with a symbol and a reference number. A verbal instruction such as "reinforce the handles" produces four different interpretations on four machines.
Size, Density and Thread
State tack length in millimetres, density in stitches per centimetre, and the thread ticket. These three numbers define the tack and are all measurable at inspection.
Backing Layer
State whether a patch, interfacing or nothing sits behind the point, and its thickness. The backing is the part most often omitted in bulk because it is invisible.
| Specification field | Example form |
|---|---|
| Placement | Marked on drawing |
| Tack length | Millimetres |
| Density | Stitches per cm |
| Thread | Ticket number |
| Backing | Material and thickness |
Inspection at the Line
Reinforcement is checked in seconds per bag when the checks are chosen for speed rather than for completeness.
Visual Checks
Confirm the tack count per root, that each tack sits across the seam end, and that no tack runs past the patch edge. A tack that hangs over the patch edge has lost its backing.
Measured Checks
Measure tack length on the first piece and every twentieth thereafter. Measure density by counting stitches in a centimetre on the same pieces.
Destructive Checks
Cut one bag per lot through a handle root to see whether the backing layer is present and whether the lock sits inside. This is the only check that proves the invisible half of the specification.
| Check | Frequency | Time |
|---|---|---|
| Tack count | Every piece | Seconds |
| Position | Every piece | Seconds |
| Length | 1 in 20 | Under a minute |
| Density | 1 in 20 | Under a minute |
| Section cut | Per lot | Minutes |
Common Reinforcement Errors
The same five mistakes appear across factories and styles, and each one is cheap to prevent at sampling.
Adding Stitches Instead of Material
When a handle feels weak, the instinct is to sew more. On leather, more stitches remove more material between holes and make tearing easier.
Missing the Backing in Bulk
A sample is often reinforced by hand and the bulk is not. The specification must make the backing a line item, or it will quietly disappear when the line speeds up.
Tacks Placed by Eye
Without a marked position, four operators place four different tacks. A template or a marked drawing removes the variation for the cost of one pattern.
Rivets Without Washers
A rivet set without a washer concentrates load on a small area of the panel. The washer is the cheapest component in the assembly and the first to be omitted.
Testing Only the Handle
Testing the most obvious point leaves ring loops, zip ends and base corners unverified. Each point has its own load and needs its own check.
| Error | Consequence |
|---|---|
| Extra stitches | Tearing along holes |
| Missing backing | Early pull-through |
| Eyeballed placement | Variation |
| No washer | Rivet pull-through |
| Handle-only testing | Unseen weak points |
Verifying Reinforcement at Sampling
Sampling is the only stage where a reinforcement decision can be changed without rebuilding tooling, so it deserves a deliberate check.
Build One Bag to Fail
Make a sample that deliberately uses the intended reinforcement, then load it well beyond its rating. Where it fails tells you which point is under-specified, and the answer is rarely the handle.
Section the Sample
Cut through a handle root and a ring loop on a rejected sample. The section shows whether the backing is present, whether the lock sits inside, and whether the patch extends beyond the tack.
Record What Was Approved
Photograph the section and attach it to the approved sample. The photograph is what a factory can match two seasons later when the original sample has been lent out.
| Sampling check | Output |
|---|---|
| Overload test | Weak point identified |
| Section cut | Backing confirmed |
| Photograph | Reference for bulk |
| Approved sample | Physical standard |
Cost and Workstation Time
Reinforcement adds time at a specific workstation, and the cost is easier to justify when it is stated in seconds rather than in principle.
The Time Each Element Adds
A bar tack program runs in a few seconds; a patch adds cutting, bonding and a handling step; a rivet adds setting and inspection. The tack is almost free, and the patch is where the money goes.
Where to Spend
Spend on the four handle roots and the ring loops, where failures actually occur. Base corners and gusset folds can often be handled by material choice rather than by added operations.
The Cost of Getting It Wrong
A returned bag costs the freight, the replacement and the review, which is many times the reinforcement it lacked. That comparison is the argument for the specification, not the price of a tack.
| Element | Time cost | Failure cost avoided |
|---|---|---|
| Bar tack | Seconds | High |
| Patch and bond | Minutes | High |
| Rivet and washer | Seconds | Moderate |
| Interfacing | Seconds | Moderate |
Reinforcement Across Bag Types
The rules are constant, but the balance between them shifts with the shape of the bag and how it is carried.
Carriers and Crates
A pet carrier is lifted by two handles with the animal's weight inside, so the handle roots and the base panel both carry high load. The base usually needs a board as well as stitching reinforcement.
Backpack Carriers
A backpack carrier puts load on shoulder straps and on the point where they meet the body. Those two points need continuous reinforcement from the strap into the base rather than local tacks alone.
Slings and Shoulder Bags
A sling concentrates all load on one strap root, which makes a single point the most critical in the product. Reinforcement there should be the heaviest in the range, with a patch that extends well past the tack.
Totes and Soft Carriers
A soft tote distributes load across a wide top edge, so the risk moves from tearing to sagging. A stiffened top edge does more than adding tacks at each root.
| Bag type | Critical point | Dominant response |
|---|---|---|
| Carrier | Handle roots and base | Patch and board |
| Backpack carrier | Strap-to-body join | Continuous path |
| Sling | Single strap root | Heaviest patch |
| Soft tote | Top edge | Stiffening |
Serviceability and Replacement
Some stress points wear out before the bag does, and how they are built decides whether the bag can be repaired.
Replaceable Rings
A screw post or a split ring allows a worn attachment to be changed without opening a seam. That choice costs a little at assembly and saves a whole bag in aftercare.
Repairable Loops
A ring loop sewn with an accessible bar tack can be re-tacked by a repairer. A loop enclosed inside a bonded panel cannot, which turns a small repair into a rejection.
That distinction should be visible on the drawing as well as in the sample, because a repairer cannot recover an intention that was never written down. A short note naming the serviceable point saves the buyer an argument and the factory a return.
Designing for the Second Owner
Bags that pass to a second household are increasingly common, and a serviceable stress point extends that life. The reinforcement decision is therefore also a durability decision.
| Attachment | Serviceable | Cost |
|---|---|---|
| Screw post | Yes | Moderate |
| Split ring | Yes | Low |
| Sewn loop, accessible | Partly | Low |
| Sealed loop | No | Lowest |
Machine Set-Up for Bar Tacks
A tack is only as good as the machine that sews it, and three settings decide whether the stitch locks or tears.
Dense Zigzag Settings
The tack program sets stitch width and length together, and a narrow width with short length produces the density the specification asks for. A width set too wide spreads the tack into a patch rather than a lock.
Thread and Tension
Tack thread is usually the same ticket as the seam or one heavier. Tension set for a straight seam will often loop on a tack because the direction reverses many times in a few millimetres.
Needle and Material
A leather point needle in the size used for the panel prevents a visible hole at each reversal. A sharp point on leather creates a line of cuts that the tack then pulls apart.
| Setting | Effect if wrong |
|---|---|
| Width | Tack too broad |
| Length | Density too low |
| Tension | Loops at reversal |
| Point | Cuts along tack |
Fixtures and Templates
Placement is the least technical part of reinforcement and the most common cause of variation, which makes a template the highest-value tool on the line.
A Marked Template
A template with the four handle-root positions marked removes the need for judgement. It is made once from the pattern and used for the life of the style.
A Sewing Fixture
A fixture that holds the panel at the correct angle under the tack machine reduces both placement error and cycle time. It pays for itself on the first hundred pieces.
When to Skip the Fixture
For low volumes, a marked template and a trained operator are enough. A fixture becomes worthwhile when the style runs long enough for placement variation to reach a customer.
| Volume | Method |
|---|---|
| Under 200 pieces | Marked template |
| 200 to 1,000 | Template plus check gauge |
| Over 1,000 | Sewing fixture |
| Repeat seasons | Fixture retained |
Using Warranty Data as an Input
Returns are the cheapest research a factory can be given, because each one names a stress point that the specification missed.
Reading the Return Location
Group returns by the point that failed rather than by the reason written on the form. Ten returns at one handle root is a specification problem, not ten operator mistakes.
The Season Lag
A reinforcement decision made in one season shows in returns a year later, so the data always refers to an older construction. That lag is why the schedule should be reviewed rather than remembered.
Closing the Loop
Feed the return locations back into the technical drawing, and mark which point changed. Without that step, the data informs nothing and the same failure repeats.
| Data source | Use |
|---|---|
| Return location | Point to review |
| Repair notes | Which repair worked |
| Section cuts | Whether backing present |
| Season comparison | Whether change held |
A Reinforcement Schedule in One Table
The schedule is the document that turns the discipline into something a factory can build and a buyer can audit.
What the Schedule Lists
Each stress point, its load type, the reinforcement method, the dimensions, the backing and the inspection check. Six columns cover the whole specification.
Who Owns It
The pattern maker writes it, the line uses it and the buyer approves it. It changes only when the drawing changes, and every change is dated.
How It Is Used at Audit
At an audit, the schedule is compared with a physical section. A schedule that cannot be matched to a cut bag is a document, not a control.
| Point | Method | Check |
|---|---|---|
| Handle root | Patch plus two tacks | Count and length |
| Ring loop | Box-X plus rivet | Section cut |
| Zip end | Single tack | Position |
| Base corner | Patch | Thickness |
Training Operators on Reinforcement
Reinforcement is one of the few operations where the operator can see whether the result is correct, and training should make use of that.
Showing a Cut Section
An operator who has seen a cut handle root understands why the patch matters. A photograph in the work instruction does the same job without stopping the line.
Recognising a Missing Backing
The backing cannot be seen from outside, but its absence can be felt as a soft spot under the tack. Teaching that check takes a minute and catches the most common bulk failure.
Authority to Reject
A tack that has run off the patch edge should stop the piece, not continue to finishing. Written authority to reject is what turns a training point into a control.
| Training element | Result |
|---|---|
| Section photograph | Understanding |
| Feel check | Backing detection |
| Reject authority | Containment |
| Refresher | Consistency |
Briefing a Supplier on Reinforcement
A supplier will build what is specified, so the brief has to specify rather than describe.
Lead With the Load
Explain what the point carries and how the bag is used. A factory that understands the load will make sensible choices where the specification is silent.
Name the Check, Not Only the Method
Stating that the tack will be sectioned at audit changes how the backing is treated on the line. The check is often more persuasive than the requirement.
Agree the Sample Standard
Approve one physical bag with sectioned points, and keep a second in the factory. Two identical references remove the argument that always follows a change of line.
| Brief element | Purpose |
|---|---|
| Load description | Sensible judgement |
| Named check | Attention |
| Sectioned sample | Physical reference |
| Duplicate kept | Continuity |
FAQ
What is a bar tack and why is it used on bags?
A: A bar tack is a short run of dense zigzag stitching that locks a seam end and spreads load over a small area. It is used wherever a handle, strap or ring pulls against a panel.
How long should a bar tack be on a pet bag?
A: Most handle roots use tacks between eight and fifteen millimetres, with density of eight to twelve stitches per centimetre. The length matters less than the combination with the backing layer beneath it.
Is a box-X stronger than a bar tack?
A: Not in absolute terms. A box-X suits wide straps that would curl at the end, while a tack concentrates strength in a smaller area on narrow roots, which is usually better on leather.
Do I need a reinforcement patch behind every handle?
A: Where the panel is under two millimetres and carries a loaded handle, yes. A patch doubles the material resisting tear without altering the outside appearance.
Should rivets replace stitching at stress points?
A: Rarely. The strongest attachment usually combines a stitched loop with a rivet that stops the loop spreading. A rivet alone pulls through thin or coated material.
Why do rivets pull through panels?
A: Because they were set without a backing layer or a washer, so load concentrates on a small area. The hole enlarges until the head passes through, usually within a season.
How many tacks does a handle root need?
A: Two, one at each seam end, is the common minimum, and three shorter tacks distribute better on thin panels. More than three in a small area removes material between holes.
Why does extra stitching make leather weaker?
A: Each penetration removes material and creates a line along which a tear can propagate. Dense stitching in a small area converts a strong panel into a perforated one.
How is reinforcement inspected in production?
A: Count and position are checked on every piece, length and density on every twentieth, and one bag per lot is sectioned through a handle root to confirm the backing is present.
What does a section cut reveal?
A: Whether the backing layer exists, whether it extends beyond the tack, and whether the thread lock sits inside the material. It is the only check that proves the invisible half of the specification.
How should stress points be marked on a drawing?
A: With a symbol and a reference number, plus a schedule listing the method, dimensions, backing and inspection check. Verbal instructions produce different results on different machines.
Which stress points are most often missed?
A: Ring loops, zip ends and base corners. The handle gets attention because it is visible, while the points that wear through are usually the ones nobody tested.
Does reinforcement change with the bag type?
A: Yes. A sling concentrates load on one strap root, a carrier shares it across four, and a backpack carrier needs a continuous path from strap to base rather than local tacks.
Can a worn stress point be repaired?
A: If the loop or the tack is accessible, yes. A screw post or an exposed bar tack can be renewed, while a loop sealed inside a bonded panel usually means the bag is rejected.
How much time does reinforcement add?
A: A bar tack program runs in seconds, a patch adds minutes through cutting and bonding, and a rivet with a washer takes seconds. The cost is concentrated in the patch, not the tack.
What is the most common reinforcement mistake in bulk?
A: The backing layer disappearing once the line speeds up, because a sample was reinforced by hand and the bulk specification never named the patch as a required component.
Ready to make reinforcement a specification instead of a habit? Mark every stress point on the drawing, state the tack length, density, thread and backing, then confirm it with one sectioned sample kept at the factory and one at your side. Review the schedule against return locations each season and let the failures tell you which point to change next.