How Do You Specify Zip Type, Size and Load Rating for Pet Bags?
- Why the Zip Is a Structural Component
- Types of Zip and Where They Belong
- Sizes, Teeth and Slider Numbers
- What Load Ratings Actually Mean
- Matching the Zip to Animal Load
- Sliders, Pullers and Locking
- Curves, Corners and Tension
- Pet-Specific Risks at the Zip Line
- Assembly: Tape, Stops and Seam Allowance
- Durability, Cycles and Failure Modes
- Testing and Incoming Inspection
- Writing the Zip Specification
- Cost Drivers in Zip Selection
- FAQ
A zip on a pet carrier is asked to do more than close an opening. It holds a resisting animal inside, it is opened and closed several times a day, and it sits where claws, hair and grit collect.
That combination makes the zip one of the few components that can fail visibly and dangerously at the same time. A slider that bursts open releases the animal; a coil that jams makes the carrier unusable at the worst moment.
Most zip problems trace back to a specification that names a size but not a type, or a type but not a load expectation. What follows covers the zip as a structural part, the types and where each belongs, sizes and numbers, load ratings, matching to the animal, sliders, curves, pet behaviour, assembly, failure modes, testing, specification and cost.
Why the Zip Is a Structural Component
Treating the zip as a trim item is the root of most field failures, because the zip line carries load whether or not the design acknowledges it.
Load Along the Zip Line
When a carrier is lifted with an animal inside, the shell tries to deform and the zip line becomes the seam that resists it. The tape, the stitching and the teeth all take part of that load, and the weakest of the three decides the outcome.
Where the zip runs over the top of the bag, it also carries the tension of the animal pressing against the closed opening.
Opening Size and Access
A zip that is too short forces the handler to compress the opening, which strains the teeth at the ends. A zip that is too long leaves unsupported tape beyond the last stop.
Access also matters: a carrier opened from the top behaves differently from one opened at the end, and the zip position follows the handling rather than the styling.
What Happens When It Fails
Failure modes differ by type. A coil can burst open under lateral load, a metal tooth can break and jam the slider, and a tape can tear away from the shell at the stitching. Each leaves the carrier in a different state, and only some allow the animal to be secured again.
Designing for a failure that keeps the animal contained is a legitimate requirement in this category.
| Zip role | Load seen | Design response |
|---|---|---|
| Top opening | Tension and lateral | Sized up, two sliders |
| End opening | Local strain | Reinforced ends |
| Side access | Low | Standard size |
| Expandable gusset | Cyclic opening | Coil, generous curve |
| Ventilation panel | Low | Fine coil |
| Base access | Low but soiled | Coated coil |
| Full-length opening | Bending and abrasion | Reverse coil |
| Emergency opening | Rare, high strain | Metal or moulded |
Types of Zip and Where They Belong
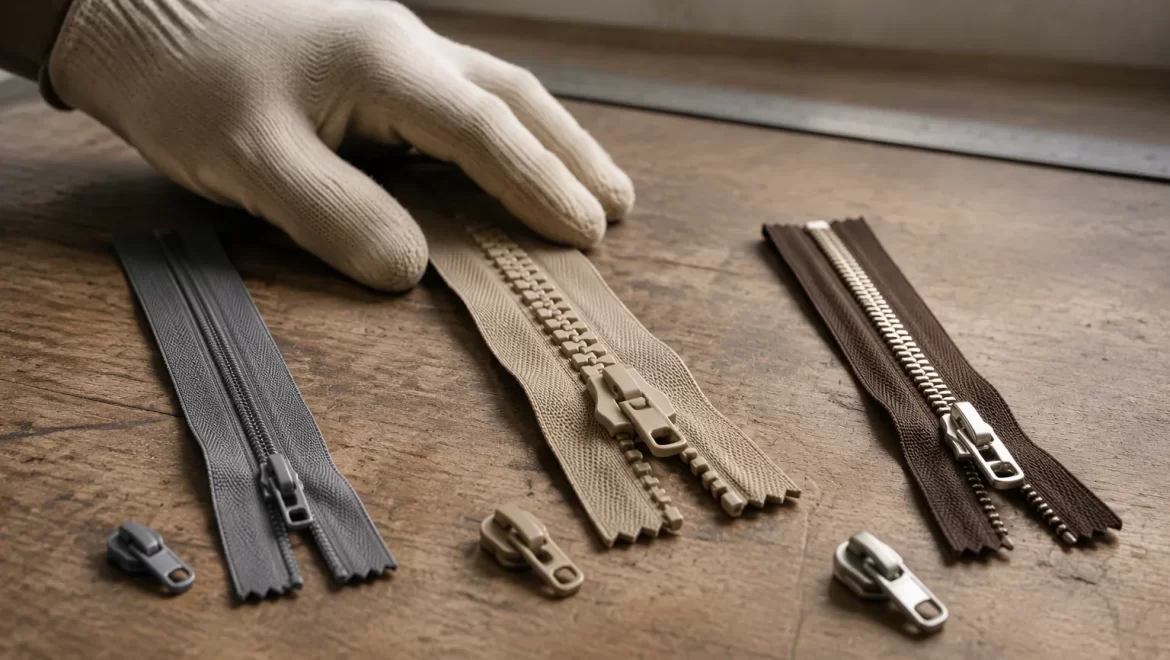
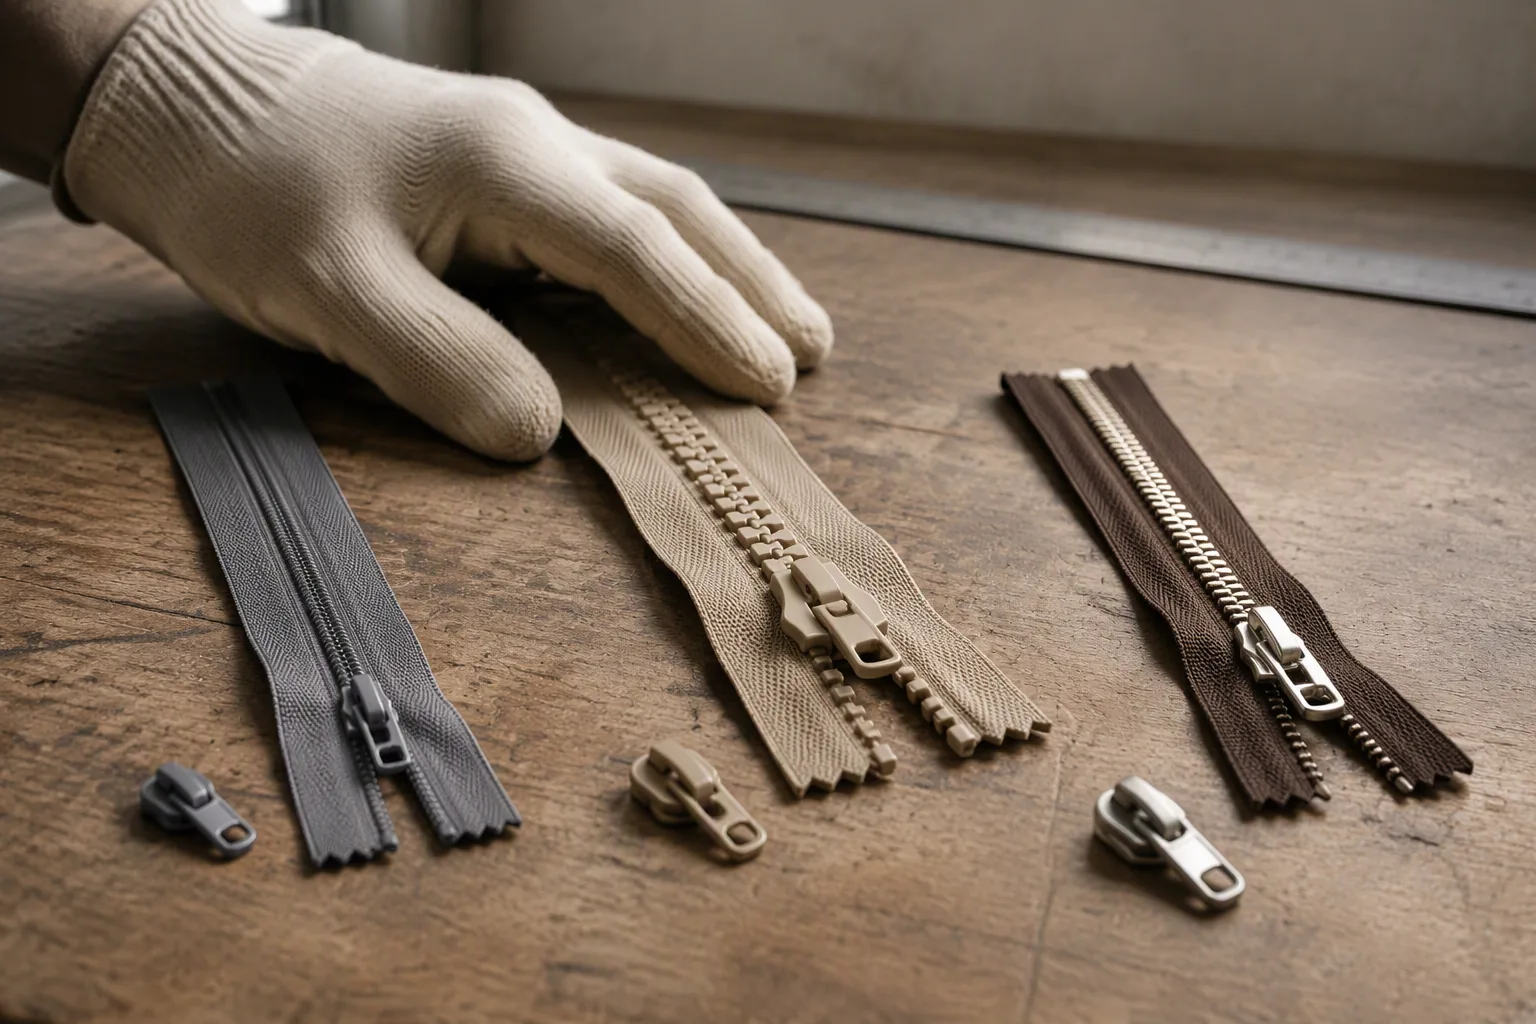
Zip types differ in how the teeth engage, and that difference decides burst resistance, flexibility and how the zip behaves when dirty.
Nylon Coil
A coil zip is formed from a continuous filament sewn into the tape, which makes it flexible, light and tolerant of curves. It is the default for soft carriers because it follows a curved opening without fighting the seam.
Its weakness is lateral burst: a coil can be forced apart under sideways load, which matters where an animal pushes against the closure.
Moulded Resin Teeth
Moulded teeth are formed individually on the tape, giving a more rigid, more positive engagement than a coil. They resist burst better and tolerate grit, at the cost of flexibility on tight curves.
They suit openings that run straight or gently curved and that take repeated load.
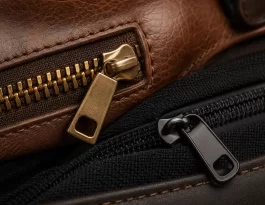
Metal Teeth
Metal teeth give the highest strength and the most positive closure, and they are the choice where a failure would be serious. They are heavier, they can corrode, and they are less forgiving on curves.
In pet carriers they suit short, high-load openings rather than long soft runs.
Reverse Coil and Water-Resistant Constructions
A reverse coil places the teeth on the back of the tape so the face shows a clean line and the teeth are protected from abrasion. It is common where the zip is visible and where the animal contacts it.
Water-resistant versions add a coated tape or a sealed finish; the coating improves shedding but does not make the closure watertight, so the requirement should be stated as reduced ingress rather than waterproofing.
| Type | Burst resistance | Flexibility | Grit tolerance |
|---|---|---|---|
| Nylon coil | Moderate | High | Moderate |
| Reverse coil | Moderate | High | Good |
| Moulded resin | High | Moderate | High |
| Metal | Very high | Low | Moderate |
| Coated coil | Moderate | High | Good |
| Two-way coil | Moderate | High | Moderate |
| Open-end moulded | High | Low | High |
| Invisible coil | Low | High | Moderate |
Sizes, Teeth and Slider Numbers
Zip sizes are quoted as a number, and that number describes the tooth chain rather than the opening it should close, which is where most sizing errors start.
What the Number Means
The gauge number refers to the width of the closed tooth chain in millimetres. A size 5 zip has a chain about five millimetres wide when closed, and the slider and the tape scale with it.
Tape Width and Seam Allowance
Tape width determines how much fabric the zip gives the seam to hold, and a narrow tape on a load-bearing seam concentrates stress at the stitching line. Wider tape spreads the load and is easier to sew without distortion.
Slider Size and Channel
The slider must match the tooth type and gauge exactly, and a mismatched slider will either jam or fail to close the chain. Slider length also affects how tightly the zip can turn a corner.
| Zip size | Typical use in a carrier | Tape handling |
|---|---|---|
| 3 | Small ventilation flaps | Narrow, light seams |
| 5 | Standard top opening | Standard seam |
| 8 | Large carrier opening | Wide tape, strong seam |
| 10 | Heavy or rigid carriers | Wide tape, reinforced |
| Coil 5 reverse | Visible top zip | Clean face finish |
| Moulded 8 | Load-bearing end | Straight run |
| Metal 5 | Short high-load opening | Short seam |
| Two-slider 8 | Wide top opening | Symmetric pulls |
What Load Ratings Actually Mean
A published rating describes one test condition, and a carrier subjects the zip to several conditions at once.
Static Versus Dynamic Load
A static rating describes a steady pull held on the closed chain, while a dynamic rating describes repeated movement. A carrier produces dynamic load every time it is lifted, because the animal shifts inside.
Pull-Off and Burst Strength
Pull-off strength describes how much force the slider resists before the chain separates at the slider. Burst strength describes how much lateral force the closed chain resists before the teeth part.
These are different failures with different consequences: a burst opens the bag along its length, while a pull-off opens it at the slider.
Cycle Life
Cycle life counts how many open-and-close cycles the zip completes before jamming or losing engagement. It is the figure that best predicts daily use, because carriers are opened far more often than they are loaded heavily.
What Ratings Do Not Cover
Ratings are measured on new components under controlled conditions. They do not cover contamination with hair and grit, exposure to moisture, distortion from the seam, or the effect of a curved path, all of which reduce real performance.
| Rating type | What it measures | Relevance to carriers |
|---|---|---|
| Static pull | Steady force at slider | Lifting a settled animal |
| Dynamic pull | Repeated movement | Carrying while walking |
| Burst strength | Lateral separation | Animal pushing outward |
| Cycle life | Opens and closes to failure | Daily handling |
| Tape pull-off | Force to tear tape from shell | Seam construction |
| Slider retention | Resistance to slider loss | Long-term usability |
| Tooth engagement | Closure consistency | Jamming and gaps |
| Contamination tolerance | Performance when soiled | Hair and grit exposure |
Matching the Zip to Animal Load
The right zip is the one sized for the animal and the handling, not the one that happens to be in stock.
Weight and Movement of the Animal
A settled animal loads the zip steadily, while a restless one produces repeated lateral pushes. The second case needs burst resistance rather than pull strength, which points towards moulded or metal teeth.
Carrier Construction and Support
Where the shell is stiff, the zip carries less of the lifting load and can be lighter. Where the shell is soft, the zip line becomes part of the load path and must be sized accordingly.
The zip specification therefore depends on the reinforcement of the bag, not only on its dimensions.
Where the Margin Should Sit
A zip should be selected with margin above the expected load rather than at the limit, because contamination and wear reduce performance over time. The margin is cheapest to add at the specification stage and most expensive to add after a complaint.
Where the animal is large relative to the carrier, the margin should be widest.
| Animal and carrier | Zip recommendation | Margin |
|---|---|---|
| Small animal, soft carrier | Coil 5 | Moderate |
| Small animal, daily opening | Reverse coil 5 | Moderate |
| Medium animal, soft carrier | Moulded 5 | Generous |
| Medium animal, stiff shell | Coil 8 | Moderate |
| Large animal, soft carrier | Moulded 8 | Wide |
| Large animal, top opening | Two-slider 8 | Wide |
| Restless animal | Moulded or metal | Wide |
| Occasional travel only | Coil 5 | Standard |
Sliders, Pullers and Locking
The slider is the part the handler touches, and it decides whether the closure stays closed under load.
Locking and Semi-Locking Sliders
A locking slider holds position when the puller is at rest, which prevents a zip from creeping open as the bag is carried. A semi-locking slider holds less firmly and is easier to operate one-handed.
For a carrier that is carried rather than wheeled, a locking slider is usually the better default.
Puller Shape and Grip
A puller that is easy to grip with cold or wet hands reduces the load applied to the slider body, because the handler can pull in line rather than at an angle. A cord or loop puller extends reach but adds a snag and chew risk in a pet product.
Where a cord is used, it should be short, attached through a closed loop and tested for pull-out.
Two-Way and Twin Sliders
Two sliders meet in the middle and allow the opening to be split, which suits wide top openings and lets the handler reach in without opening the whole carrier. Each slider must be able to travel its full length without meeting a stop.
| Slider feature | Benefit | Risk |
|---|---|---|
| Locking body | Holds position | Harder one-handed use |
| Semi-locking | Easier operation | Creeps under load |
| Non-locking | Simplest | Opens under movement |
| Large puller | Better grip | Bulk and snagging |
| Cord puller | Reach and grip | Chew and pull-out |
| Twin sliders | Partial opening | More parts to clean |
| Reversible slider | Repairs a jammed zip | Wrong orientation |
| Metal slider | Durability | Weight and corrosion |
Curves, Corners and Tension
A zip follows the seam it is sewn into, and a seam that is tighter than the zip can bend will distort the chain.
Minimum Bend Radius
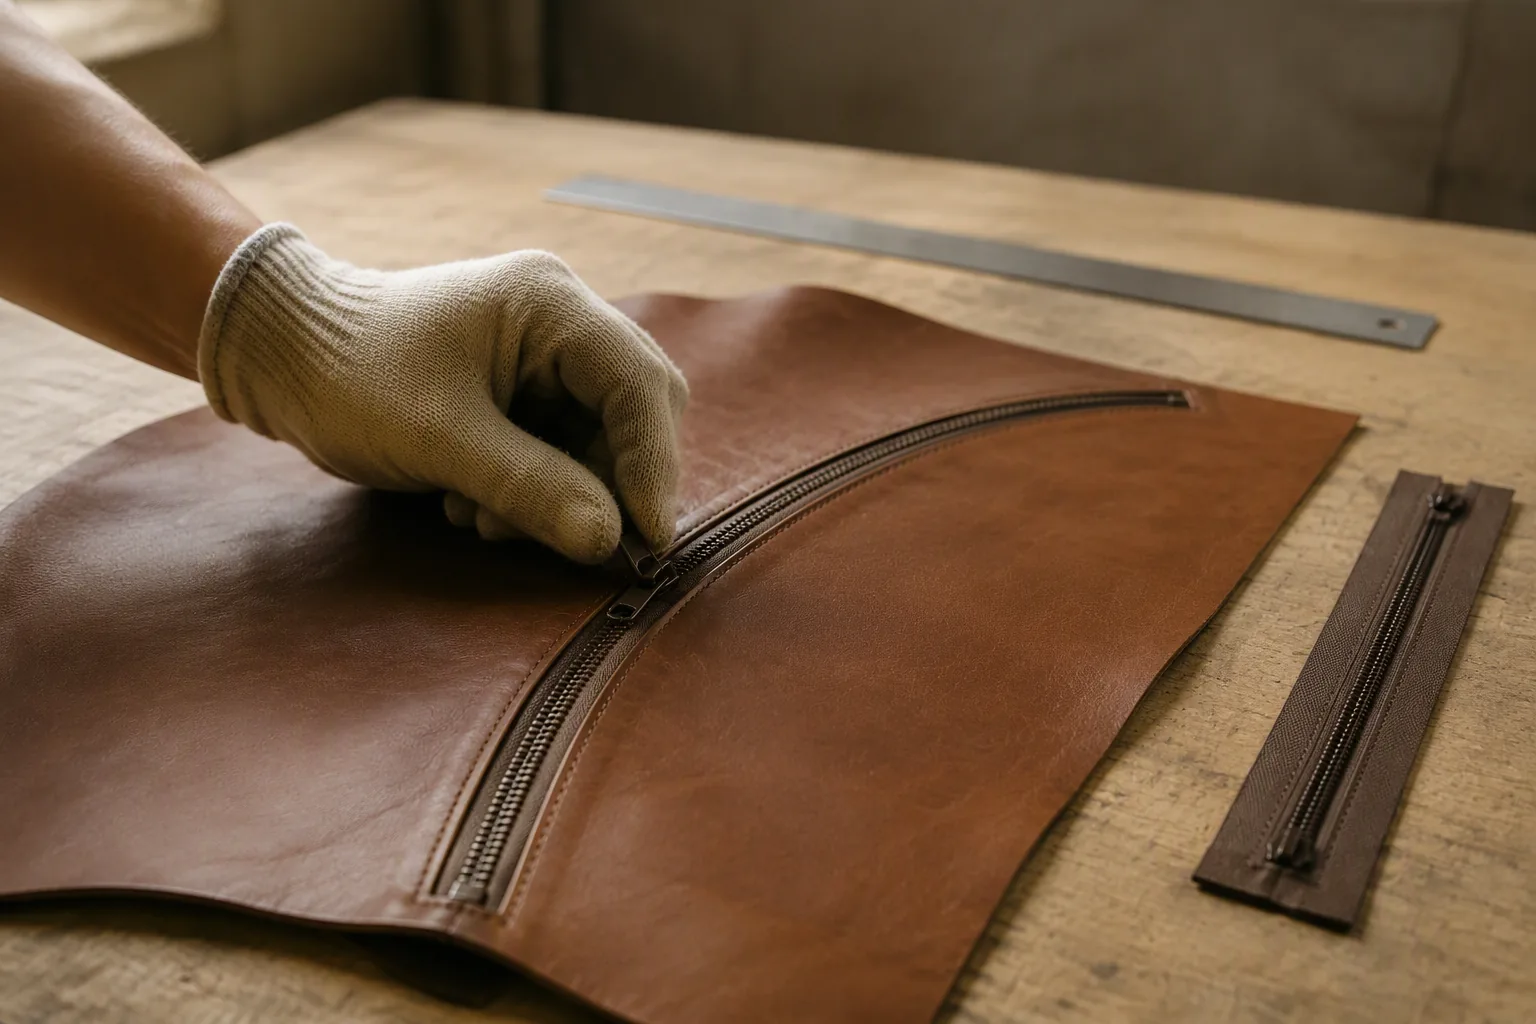
Every zip type has a radius below which the teeth cannot engage cleanly, and forcing a tighter curve causes the slider to bind. Coil tolerates tight curves better than moulded or metal, which is why curved openings usually specify coil.
Where the design needs a tight corner, the geometry should change rather than the zip.
Easing and Tension in the Seam
Sewing a zip into a curved opening requires easing one side of the tape, and uneven easing produces a wavy chain that jams. The seam should be marked and sewn in a controlled sequence so the tension stays even along the length.
Easing too much shortens the effective opening, which then strains the ends.
Corners and Stops
Corners concentrate load, so a zip that turns a corner needs a stop or a reinforced area at the turn rather than continuous teeth through the bend. A slider parked at a corner is also the most likely place for a jam.
| Path feature | Behaviour | Mitigation |
|---|---|---|
| Gentle curve | Even engagement | Standard coil |
| Tight curve | Slider binds | Larger radius |
| Right-angle corner | Local strain | Stop at the turn |
| Long straight run | Stable | Any type |
| Changing radius | Uneven tension | Sew in stages |
| Opening under tension | Chain separates | Reduce seam tension |
| Zip sewn across a fold | Kinks | Move the zip line |
| Zip at the bag corner | Abrasion | Protect the tape |
Pet-Specific Risks at the Zip Line
Pets interact with the zip in ways that no general zip specification anticipates.
Claws and Teeth
Claws catch in coil gaps and in the space between the tape and the shell, and a determined animal can work a coil apart. Moulded teeth close the gaps that a claw can enter, and a reverse coil protects the face.
Hair, Sand and Grit
Hair wraps around the slider body and works into the chain, and sand grinds the teeth. Both reduce engagement gradually rather than failing at once, which makes them hard to notice until the zip jams.
A reverse coil and a smooth tape reduce collection, and a covered slider pocket keeps debris out.
Escape Pressure
An animal pushing at the closure applies lateral load along the whole length rather than at one point, which is the condition a coil is least able to resist. This is where the type choice becomes a safety decision rather than a durability one.
Where escape pressure is expected, the specification should require burst resistance and a locking slider.
Contact Comfort
The zip line sits against the animal's face and body in many carriers, so teeth and tape edges can cause rubbing. A reverse coil with a covered tape removes most of that contact.
Padding behind the zip line is more effective than changing the zip alone.
| Risk | Mechanism | Design response |
|---|---|---|
| Claw catching | Coil gaps | Moulded teeth |
| Chewing | Exposed puller | Metal or enclosed puller |
| Hair wrapping | Slider body | Covered slider pocket |
| Grit in teeth | Open chain | Reverse coil, smooth tape |
| Escape pressure | Lateral load | Burst-resistant type |
| Rubbing | Teeth against skin | Reverse coil, padding |
| Snagging on bedding | Exposed teeth | Tape cover |
| Zip opened by paw | Non-locking slider | Locking slider |
Assembly: Tape, Stops and Seam Allowance
Assembly decides whether the zip performs as specified, and most of the decisions are made at the sewing machine.
Attaching the Tape
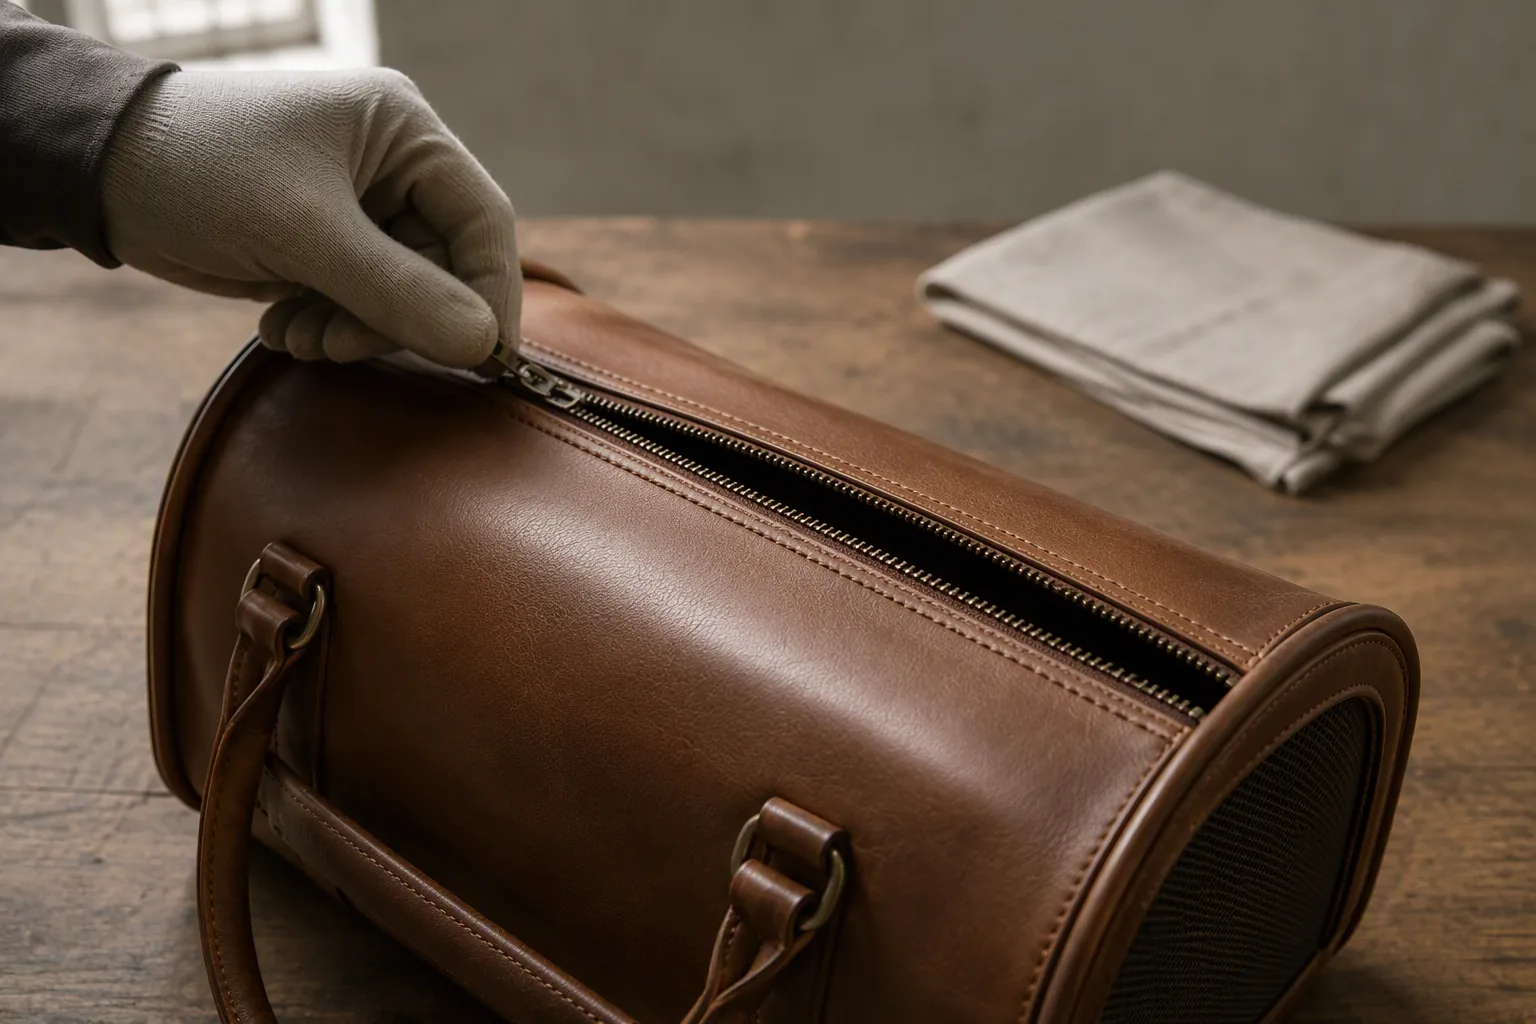
The tape is sewn to the shell and, in a lined bag, to the lining as well, so the zip is held between two layers. Stitch distance from the teeth should leave the slider a clear channel while keeping enough tape engaged.
Stitching too close to the teeth crowds the channel; stitching too far leaves the tape free to roll.
Top and Bottom Stops
Stops limit slider travel and prevent the slider leaving the chain. A missing or weak stop lets the slider run off the end, which usually destroys the zip at the first attempt to reopen it.
The stop should be positioned so that the slider parks clear of the corner and clear of the seam allowance.
Seam Allowance and Bulk
Zip seams are bulky, and the allowance must be trimmed or folded to keep the seam flat. Bulk at the ends pushes the slider out of line and is a common cause of end-of-zip jamming.
Bar Tacks and Reinforcement
Bar tacks at the ends of the zip opening stop the seam from splitting beyond the stop. They also protect the tape from peeling away under load.
The tack should cross the tape as well as the seam so the load transfers into the shell.
| Assembly point | Correct practice | Effect if wrong |
|---|---|---|
| Stitch distance | Clear channel beside teeth | Jamming or rolled tape |
| Stops | Secure, clear of corners | Slider runs off |
| Allowance | Trimmed or folded | Bulky, misaligned ends |
| Binding order | After the zip | Tape not captured |
| Bar tacks | Across tape and seam | Seam splits |
| Zip length | Matches finished opening | Strain at the ends |
| Tape width | Covers seam allowance | Under-sewn tape |
| Lining attachment | Both layers aligned | Twisted, tight zip |
Durability, Cycles and Failure Modes
Zips fail in a small number of recognisable ways, and each is preventable at the specification stage.
Wear at the Slider
The slider wears first at the point where teeth enter the channel, and the wear shows as a zip that closes but leaves a gap behind the slider. This is a slow failure that the handler often notices only after the gap appears.
Replacing the slider restores function where the teeth are intact, which is an argument for specifying a standard slider size.
Tape and Stitch Failure
Tape failure appears at the stitching line, where repeated load pulls the tape away from the shell. It is more common on narrow tape and on seams sewn with a short stitch length that perforates the tape.
Wider tape and a slightly longer stitch reduce the risk.
Corrosion and Contamination
Metal teeth corrode in humid conditions and after contact with cleaning agents, and corrosion spreads along the chain. Coil and moulded teeth avoid the issue but collect debris instead.
Whatever the type, the cleaning instruction should match the material rather than assume one method for the whole bag.
| Failure mode | Appearance | Prevention |
|---|---|---|
| Slider wear | Gap behind slider | Standard slider, replaceable |
| Tape pull-off | Stitch line separating | Wider tape, longer stitch |
| Tooth breakage | Jammed slider | Correct type for load |
| Coil burst | Opening splits | Moulded or metal teeth |
| Corrosion | Stiff, discoloured chain | Non-metal or coated |
| Debris jam | Hard travel | Reverse coil, cleaning |
| Stop failure | Slider off the end | Secure stops |
| Puller loss | No grip | Reinforced attachment |
Testing and Incoming Inspection
Zip problems are cheap to catch at goods-in and expensive to catch after assembly, so the inspection should focus on the few properties that change performance.
Goods-In Checks
Confirming type, gauge, tape width, slider compatibility and colour against the approved sample catches most substitution risk. Checking that the slider travels the full length without binding catches the rest.
Cycle and Load Testing
Cycling the assembled opening through a representative number of open-and-close movements reveals jamming and slider wear that a new sample will not show. Loading the closed carrier with representative weight then tests the chain and the stops together.
Both tests should be run on the finished assembly rather than on loose zip, because the seam and the curve change the result.
Contamination and Cleaning Tests
Working a small amount of sand or hair into the chain and then operating the slider shows how the chosen type behaves when soiled. Cleaning the sample with the intended method then shows whether the tape or the teeth are affected.
| Test | Stage | Predicts |
|---|---|---|
| Type and gauge check | Goods-in | Substitution |
| Tape width check | Goods-in | Weak seam |
| Slider compatibility | Goods-in | Jamming |
| Full-length travel | Goods-in | Binding at curves |
| Sewn sample trial | Goods-in | Seam distortion |
| Cycle test | Assembly | Slider wear |
| Loaded closure test | Sampling | Chain separation |
| Contamination test | Sampling | Debris jamming |
Writing the Zip Specification
A zip specification is short, and its value lies in naming the properties that cannot be judged by eye after assembly.
What the Specification Must State
Type, gauge, tape width, slider type and locking behaviour, stop positions, stitch distance, colour and finish, and the load or cycle requirement are the minimum. Adding the expected animal load and the carrying method explains the intent and prevents a later cost review from downgrading the zip.
Where the zip is sewn into a curve, the minimum radius should be stated so the supplier does not substitute a stiffer type.
Approved Samples and Records
A sealed sample of the assembled opening, with the zip identified by type, gauge and supplier, is the only reliable reference for later deliveries. Loose zip samples are less useful because the seam and the curve change the behaviour.
Keeping a short length of the actual tape alongside the sample allows colour and finish to be compared years later.
Managing Substitution
Substitution is common when a colour or gauge is unavailable, and the risk is that a different tooth type arrives unnoticed. The specification should require any alternative to match the stated type and gauge and to pass the same cycle and load checks.
Each accepted substitution should be recorded with its reason and result.
| Specification item | Why it matters | Common omission |
|---|---|---|
| Type and tooth form | Burst and grit behaviour | Type left open |
| Gauge | Chain strength and weight | Gauge only |
| Tape width | Seam strength | Not stated |
| Slider type | Locking behaviour | Not specified |
| Stop positions | Slider retention | Left to sample |
| Stitch distance | Channel clearance | Not dimensioned |
| Colour and finish | Match to shell | Finish omitted |
| Cycle requirement | Daily use life | Not stated |
| Minimum bend radius | Jamming prevention | Not stated |
Cost Drivers in Zip Selection
Zip cost is small relative to the bag, but the consequences of choosing on price alone are large, so the drivers should be understood rather than minimised.
What Moves the Cost
Tooth type and gauge drive material cost, followed by slider type and finish. Reverse coil and water-resistant constructions cost more than standard coil, and two-slider openings double the hardware.
Assembly cost often exceeds component cost: setting stops, bar tacking and easing a curve all consume time.
Where Cutting Cost Is Reasonable
Reducing zip length, standardising on one gauge across a range, and using a standard slider all reduce cost without weakening the closure. These changes preserve the load margin.
Reducing tape width, removing stops or downgrading tooth type does weaken the closure, and the saving is usually smaller than the risk.
Cost Against Complaint Risk
The relevant comparison is not zip price against zip price but zip price against the cost of a failure: a replacement carrier, a returned animal, or a safety incident. Where the animal load is high or the opening is the only closure, the margin is worth paying for.
Standardising across a range also reduces inventory complexity, which is a cost benefit independent of the component price.
| Cost driver | Direction | Lever |
|---|---|---|
| Tooth type | Strong | Match to load, not to habit |
| Gauge | Strong | Standardise across range |
| Slider type | Moderate | Locking only where needed |
| Reverse coil | Moderate | Visible openings only |
| Two sliders | Moderate | Wide openings only |
| Assembly time | Strong | Simplify stops and tacks |
| Number of colours | Moderate | Limit per range |
| Inventory complexity | Administrative | One gauge family |
FAQ
Which zip type is best for a pet carrier?
A: Nylon coil is the usual default because it is flexible, light and follows a curved opening. Where the animal pushes against the closure, moulded resin teeth resist burst better, and metal teeth suit short openings that carry high load.
What does the zip number mean?
A: The gauge number refers to the width of the closed tooth chain in millimetres. A size 5 zip has a chain about five millimetres wide. It does not describe strength on its own, because a coil and a moulded zip of the same gauge behave differently.
What does a zip load rating actually measure?
A: A rating describes one test condition, such as a steady pull at the slider or a lateral force on the closed chain. It does not cover contamination, moisture, seam distortion or a curved path, all of which reduce real performance.
Is a higher load rating always better?
A: Not necessarily. A stronger zip is usually heavier and stiffer, which makes it harder to sew into a curve and less comfortable against the animal. The correct choice is the type that resists the load the carrier actually sees, with margin.
Why does my zip burst open when the animal pushes?
A: Because a coil resists lateral force poorly, and an animal pushing outward loads the whole chain sideways. Moulded or metal teeth resist that condition, and a locking slider prevents the closure creeping open.
Should the slider be locking or non-locking?
A: A locking slider holds position when the puller is released, which prevents the zip creeping open while the carrier is carried. A semi-locking or non-locking slider is easier to operate one-handed but opens more readily under movement.
Why does the zip jam at corners?
A: Because a zip can only bend to a minimum radius before the teeth cannot engage cleanly, and a corner concentrates load at one point. Increasing the radius or placing a stop at the turn removes the problem.
Can a zip be sewn into a tight curve?
A: Coil tolerates tight curves better than moulded or metal teeth, but every type has a limit. Where the design needs a tighter corner than the zip allows, the geometry should change rather than the zip.
How wide should the zip tape be?
A: Wide enough to cover the seam allowance with a clear margin beyond the stitching line. Narrow tape on a load-bearing seam concentrates stress at the stitch line and is a common cause of tape pull-off.
How far from the teeth should the stitching run?
A: Far enough to leave the slider a clear channel, and close enough that the tape stays engaged under the stitch. Stitching too close crowds the channel, while stitching too far lets the tape roll.
Why are bar tacks needed at the ends of a zip?
A: They stop the seam splitting beyond the opening and protect the tape from peeling away under load. The tack should cross both the tape and the seam so the load transfers into the shell.
What is a reverse coil and when is it used?
A: A reverse coil places the teeth on the back of the tape, so the face shows a clean line and the teeth are protected from abrasion and contact. It suits visible openings and carriers where the zip sits against the animal.
Do water-resistant zips keep a carrier dry?
A: They reduce ingress but do not make the closure watertight, because the slider and the stops remain paths for liquid. The requirement should be stated as reduced ingress rather than waterproofing.
How many open-and-close cycles should a carrier zip survive?
A: The requirement should follow how often the carrier is opened. A carrier opened several times a day needs a cycle life far beyond occasional travel use, and cycle life is usually a better predictor of daily performance than a single load figure.
How should zips be cleaned?
A: Follow the material rather than a general method: coil and moulded teeth tolerate damp wiping, while metal teeth need drying to avoid corrosion. Cleaning instructions should match the zip type and should be written into the product care guidance.
What should be checked when zips arrive at the factory?
A: Type, gauge, tape width, slider compatibility and colour against the approved sample, plus full-length slider travel. Sewing a short sample to scrap shell then shows how the tape behaves in the actual seam.
Ready to specify zips as structure rather than trim? Name the type, gauge, tape width, slider and stops, match the chain to the animal load rather than to habit, keep the bend radius inside the limit, and check cycle life and burst resistance on the assembled opening. Then sew a sample into the real shell, load it, soil it, and keep a sealed reference with a length of the actual tape so the next delivery can be judged against it.